Due to a highly amusing incident involving a “Delete” button, the first half of tonight’s update is somewhat bereft of pictures 
Last remaining bit of clean-up work to do before starting to re-assemble was to grind (or lap) the valves into the valve seats. To be honest, I’ve no idea if my technique was right or not, but I started each valve with a smear of coarse paste on the seat and twirled away until boredom set in, then wiped clean, smeared some fine paste and repeated. By the time I’d done all eight I was knackered, but they all had a definite ring of contact around the valve seats and pretty much no sign of pitting. My take on it is that it’s done now – and pretty much anything’s got to be better than the crud-encrusted state it was in before 
After popping in for a cuppa and some extra socks, it was time to go back out and finally start putting things back together 
For anyone who missed the recent fun competition, this is the gasket set that I got from Burtons.
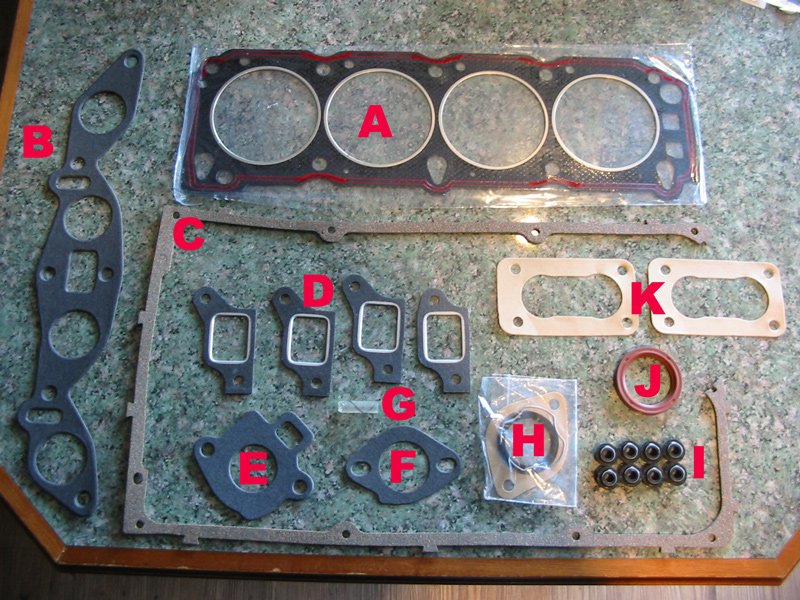
And the parts were identified as follows;
A. Head gasket
B. Inlet manifold
C. Rocker cover
D. Exhaust manifold
E. Believed to be for a VV carb (not needed for me)
F. Believed to be for a Motorcraft single choke carb (not needed for me)
G. Valve stem seal installation widget
H. Thermostat gasket, ring and retaining clip
I. Valve stem seals
J. Camshaft oil seal
K. Carb (either side of spacer block)
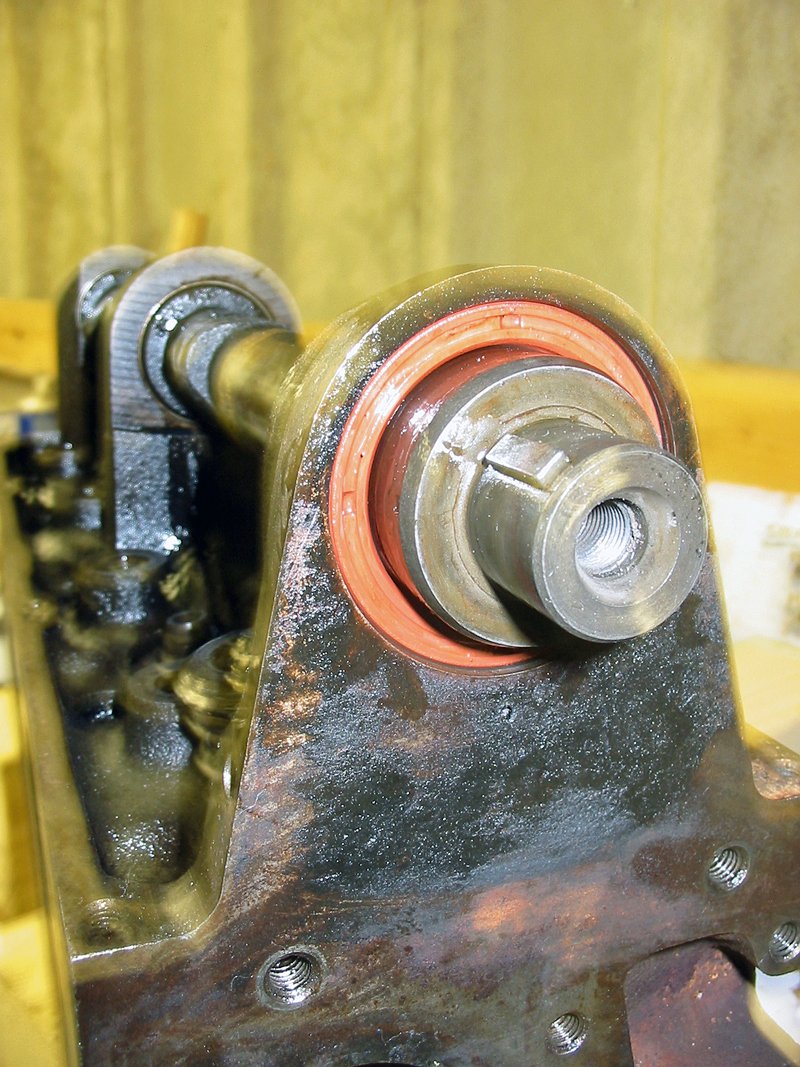
The first thing to go in was the camshaft, with all the bearing surfaces oiled up beforehand, followed by the new oil seal into the front.
Now that I’d taken everything apart, Graham’s description of what G was for made alot more sense;
 Originally Posted by graham bahr
Here’s the plastic tube over the tip of the valve stem, with the seal slid down over the top.

After pulling the plastic tube clear, each seal is then pressed into place with the aid of a deep socket – 12mm is a good snug fit.
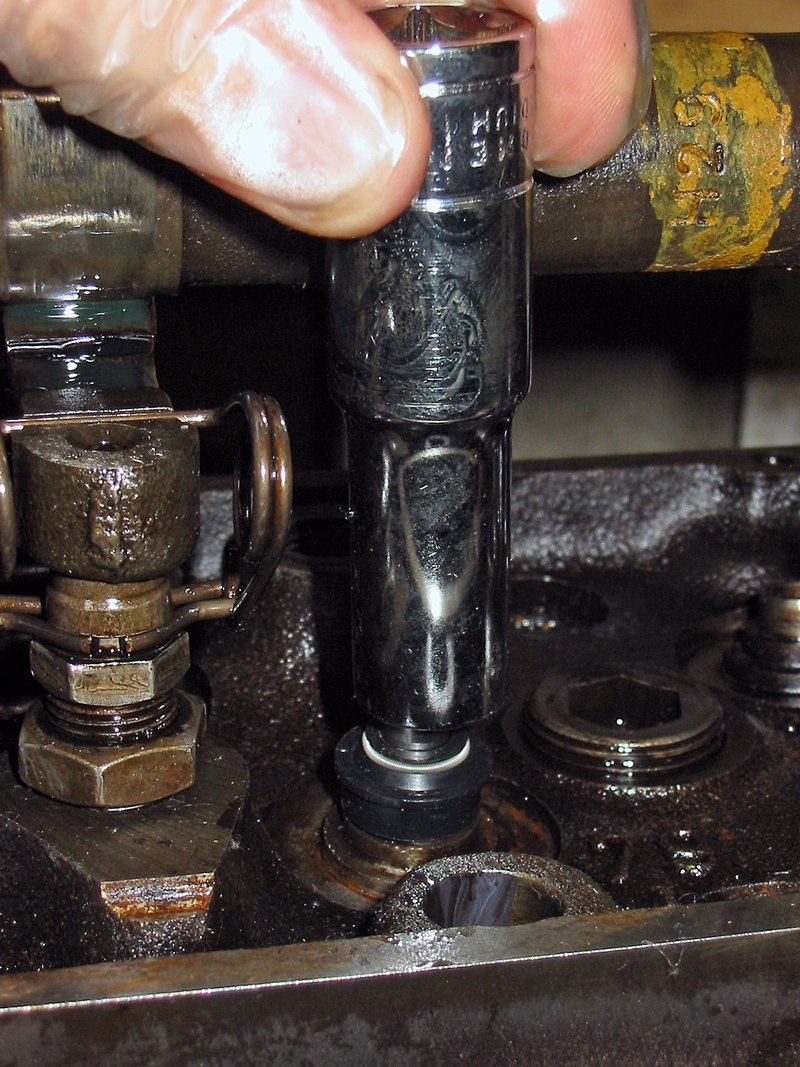
After that, it’s on with the valve spring, clamp it up and re-insert the collets into their grooves on the end of the valve stems. They’re a bit of a bugger to get in, but I found that winding the compressor a bit tighter gave me the extra room for manouevre, and you get the knack for it after the first couple 

Next job wll be setting the valve clearances, whilst everything’s accessible, before lugging the head back onto the block (did I mention it’s heavy?  ). That’ll be the weekend though before I can get back out there
Ooh, while I think on – how do I “check the endfloat on the camshaft thrust plate“? The book said I should do it, but didn’t tell me where it was or what it looked like 
EDIT 20/09/07:
dangerousdave : for the endfloat, i’ve never seen or had a pinto in bits but i would assume there’s some form of plate that secures the camshaft into the housing in the head to stop it from spinning its way out in use. You need to check how much the camshaft moves in and out (forwards and back if engine is in the car) between as far back as it can go and it hits the end of the carrier, and as far forward as it can come when it hits the bolted on plate (if that’s what it has!?) with a feeler gauge 
me : There is indeed such a plate at the back of the camshaft Dave, so I’ll get my feelers onto it and see what gives 
sven : Yes very dedicated but I’ve never seen anyone move the cam shaft round with a spanner before, well not like that. what cam is it? And I never had that bit of tube in any of my gasket set, must be my fault for being tight and buying cheapies
me : Don’t worry sven, the spanner’s not on a lobe  It’s a standard cam with two knobbly bits behind the sixth lobe that are designed for just such use – and so you can grip the camshaft when undoing the front pulley bolt